I’ve Moved and So Should You

After blogging on Live Spaces for a couple of years, I’ve made the difficult decision to move to my own domain. All of the content and comments have been migrated to the new site. Although this site will remain available I will no longer update with new posts comments have been turned off. If you would like to comment on a post, the new site allows comments on all old posts.

Please update your links and RSS reader settings:


Sev17.com

RSS Feed


Note: If you receive this blog through one of the sites I syndicate to, no action is required.

Posted in Uncategorized | Leave a comment

SQLIse A Powershell Based SQL Server Query Tool

SQL Server Powershell Powershell Extensions (SQLPSX) has been updated to version 2.1. The most notable change is the addition of a Powershell Integrated Scripting Editor (ISE) module called SQLIse (pronounced “SQL Ice”). The module provides a basic IDE for T-SQL that includes the ability to edit, execute, parse and format SQL code from within Powershell ISE.

SQLIse Features

  • Offline parsing of T-SQL code
  • Formatting (prettifying) of T-SQL with an extensive customization abilities
  • Comment/Uncomment T-SQL code
  • Uppercase/Lowercase T-SQL code
  • Execute T-SQL code and output to grid, text, text file or CSV file
  • Apply any of the above actions to selections of code by highlighting

SQLIse Requirements

SQLIse uses the following modules that part of the CodePlex project SQLPSX as well as PowershellPack available on MSDN Code Gallery:

  • SQLParser (SQLPSX)
  • AdoLib (SQLPSX)
  • IsePack (PowershellPack)
  • WPK (PowershellPack)

NOTE: The use of external modules is a change for SQLPSX, however sometimes its important to leverage other people’s code to greatly simplify your own. So, in order to use SQLIse you’ll need to install both SQLPSX and the PowershellPack.

Credits

A big thanks to Mike Shepard for creating the AdoLib module and James Brundage for his excellent WPK and IsePack modules that make creating GUIs and customizing Powershell ISE seem easy.

Next Steps

Check out this 5 minute video of SQLIse and leave some feedback on the SQLPSX site:

Posted in PowerShell | 4 Comments

Querying Oracle from Powershell Part 2

In part one we installed and configured the Oracle client software, in this post we will query an Oracle database from Powershell.  In addition we’ll look at one way to handle storing sensitive password information.

Querying and Oracle Database

To query an Oracle database we’ll use a function called Get-OLEDBData. The code listed below and is also available on PoshCode:

function Get-OLEDBData ($connectstring, $sql) {            
   $OLEDBConn = New-Object System.Data.OleDb.OleDbConnection($connectstring)            
   $OLEDBConn.open()            
   $readcmd = New-Object system.Data.OleDb.OleDbCommand($sql,$OLEDBConn)            
   $readcmd.CommandTimeout = '300'            
   $da = New-Object system.Data.OleDb.OleDbDataAdapter($readcmd)            
   $dt = New-Object system.Data.datatable            
   [void]$da.fill($dt)            
   $OLEDBConn.close()            
   return $dt            
}

The Get-OLEDBData function has been tested against SQL Server, Informix, Oracle and Excel data sources. In addition other data source can be addressed all that is needed is a valid connection string, the ability the data source to support OLEDB connections and of course the appropriate drivers. See connectionstring.com for a list of connection string examples. The hard part of querying an Oracle database from Powershell is setting up the Oracle Client software demonstrated in part one. Using the Get-OLEDBData function is simple, just pass a connection string and a query as follows:

$connString = "password=assword;User ID=SYSTEM;Data Source=XE;Provider=OraOLEDB.Oracle"            
$qry= "SELECT * FROM HR.DEPARTMENTS"            
./Get-OLEDBData $connString $qry

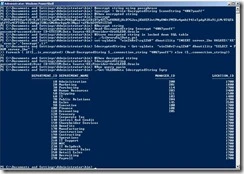
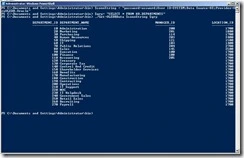
This will return all rows from the DEPARTMENTS table in HR schema:

oraclePowershell1

As long as your Oracle client software is installed and configured correctly and you have a valid connection string, specifying a database user with sufficient rights the query works. One issue immediately apparent is the sensitive password information. This especially true if you intend to use this technique for automated batch jobs. To address the password issue we’ll need to encrypt the connection string and the store the password somewhere. Let’s a look at one solution…

Encrypting Connection Strings

Ideally everything would use Windows authentication and you wouldn’t need to store password information. The reality is this simple isn’t the case especially with Oracle databases. Unfortunately there aren’t any native encryption cmdlets in Powershell (I’d love to see a cmdlet that would use certificates in order to avoid pass phrases), there are however a very nice and set of Powershell encryption functions created by Steven Hystad called Library-StringCrytpo.

To use the encryption functions download the Powershell script and source the library, then call the Write-EncryptedString function passing our connection string we want to encrypt with a passphrase. To decrypt the connection string call the Read-EncryptedString function with the encrypted string and passphrase.

#Source Encryption Functions            
. ./Library-StringCrypto.ps1            
#encrypt string using passphrase            
$encrypt = Write-EncryptedString $connString "4#&7yaoff"            
#Show encrypted string            
$encrypt            
#Decrypt string            
Read-EncryptedString $encrypt "4#&7yaoff"

The encrypt functions work well, but I like to do is then take the encrypted string and store it in a SQL Server table that is locked down. To do we’ll need to first create a table in SQL Server database as follows:

CREATE TABLE [dbo].[server_lku](
        [server_name] [varchar](255) NOT NULL,
        [server_type] [varchar](25) NOT NULL,
        [connection_string] [varchar](2000) NOT NULL,
        [is_encrypted] [bit] NOT NULL,
CONSTRAINT [PK_server_lku] PRIMARY KEY CLUSTERED
(
        [server_name] ASC
)WITH (PAD_INDEX  = OFF, STATISTICS_NORECOMPUTE  = OFF, IGNORE_DUP_KEY = OFF, ALLOW_ROW_LOCKS  = ON, ALLOW_PAGE_LOCKS  = ON) ON [PRIMARY]
) ON [PRIMARY]

GO

SET ANSI_PADDING OFF
GO

ALTER TABLE [dbo].[server_lku] ADD  CONSTRAINT [DF_server_lku_is_encrypted]  DEFAULT ((0)) FOR [is_encrypted]
GO

Note: I’ve created the server_lku table on a server named win2k8r2sql2k8 in the database dbautility

In order to select and insert data into the server_lku table we’ll use the Get-SqlData and Set-SqlData functions from the LibrarySqlData script which I previously blogged about here.

Source LibrarySqlData , and insert the encrypted string along with few other pieces of information into our SQL table using the Set-SqlData function. To retrieve the encrypted connect string use the Get-SqlData function and then call the Read-EncryptedString function.

. ./LibrarySqlData.ps1            
set-sqldata  "win2k8r2sql2k8" dbautility "INSERT server_lku VALUES('XE','oracle','$encrypt',1)"            
#Retrive the unencrypted string            
$decryptedString = Get-sqldata  "win2k8r2sql2k8" dbautility "SELECT * FROM server_lku where server_name = 'XE'" | `
foreach { if($_.is_encrypted) {Read-EncryptedString $_.connection_string "4#&7yaoff"} else {$_.connection_string}}            
#Show decrypted string            
$decryptedString            
#Run query again            
./Get-OLEDBData $decryptedString $qry

Just as in our previous example all rows from the DEPARTMENTS table in the HR schema are returned:

oraclePowershell2

Querying Oracle databases from Powershell requires a little extra setup, but once you put these pieces in place you’re ready to start automating Oracle from Powershell!

Posted in PowerShell | 6 Comments

Querying Oracle from Powershell Part 1

In this two part blog post we will demonstrate how to query an Oracle database from Powershell. Before we can run queries against Oracle we need to install the Oracle client on our Windows machine. Unlike SQL Server, the drivers for connecting to Oracle are not included with the operating systems. The drivers are however freely available from Oracle. You can find the client software on the Oracle Database Software Downloads Page.

Downloading the Oracle Client

You’ll notice several versions of Oracle software on the download page. The software you choose will varying depending on your operating system. Generally when with dealing Oracle client software it is safe to choose the latest client version even if the Oracle database you will be connecting to is a lower version.

At the time of this blog post the following versions were the latest available:

  • 11.1.0.7.0 Windows 2008 and Windows 2008 R2
  • 11.1.0.6.0 Windows 2003

However, check the download page and choose a later version if listed. I’ve installed both the Windows 2008 and 2003 x64 versions, but for this blog series I’m using the Windows 2003 x64 version. To complete the download

  • Select See All
  • Select Oracle Database 11g Release 1 Client (11.1.0.6.0) for Microsoft Windows (x64). Note: Be sure you select the Client download and not the full Oracle database software!

Note: When you attempt to download Oracle software you will be prompted to login to the Oracle Technology Network (OTN). If you don’t have an account you’ll need to create one—It’s free.

We’re now ready to install and configure the Oracle client software.

Installing the Oracle Client

Many of the components included with the Oracle client are not needed. The following steps are used to perform a minimal Oracle client installation.

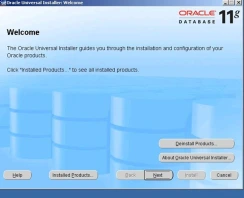
Run setup.exe

oracleClient1

Click next on the Install Welcome Screen.

oracleClient2

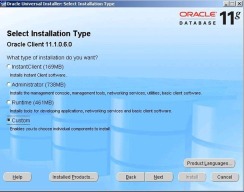
Select Custom installation type and click next.

oracleClient3

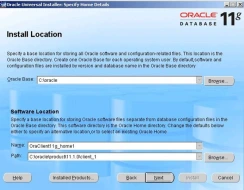
The Oracle base directory should be off of a root drive of your choosing. I’m using C:Oracle. Change the path and ensure the name field is auto populated correctly and then click next.

oracleClient4

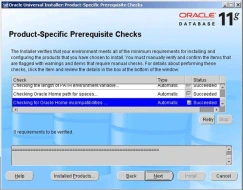
Ensure all the requirement checks succeed and click next (Note: you may receive warnings on Windows 2008 R2 when using the Windows 2008 installation software. The install will still succeed even with these warnings).

oracleClient5

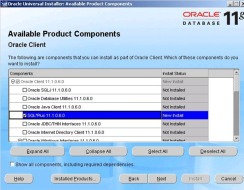
Select SQL Plus and scroll down to select more components.

oracleClient6

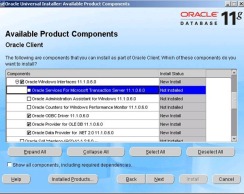
Select Oracle Windows Interfaces and ensure the first three components are NOT selected. Ensure all other Windows Interface ARE checked and scroll down to select additional components.

oracleClient7

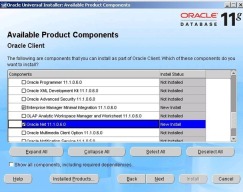
Select the Oracle Net component and click next.

oracleClient8

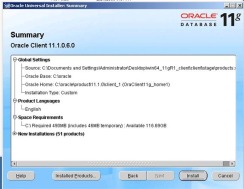
Select Install.

oracleClient9

Once the installation is complete the configuration utility will be launched by the installer.

Configuring the Oracle Client

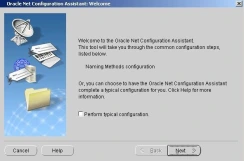
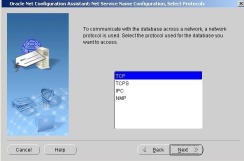
Select next from the Oracle Net Configuration Assistant Welcome screen.

oracleClient10

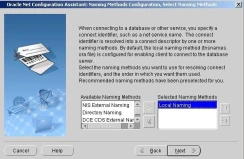
Select Next.

oracleClient11

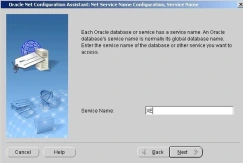
Enter the Oracle database service name. Note: I’m using Oracle Express on Ubuntu Linux. The service name is XE, your service name may differ.

oracleClient12

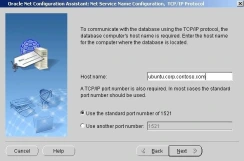
Select Next.

oracleClient13

Enter the Oracle database server host name or IP address.

oracleClient14

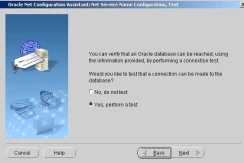
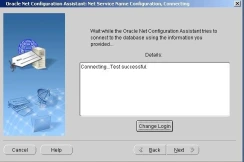
Select Next to test connectivity.

oracleClient15

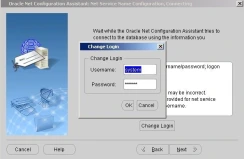
The test will fail, you’ll need to change the login and password by selecting Change Login

oracleClient16

The test should succeed and if not use the error message to troubleshoot.

oracleClient17

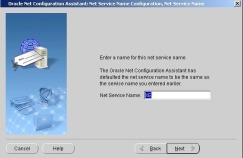
Enter an alias name and select next.

oracleClient18

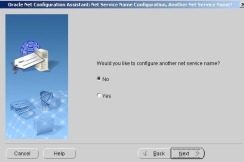
Select Next.

oracleClient19 

Select Next.

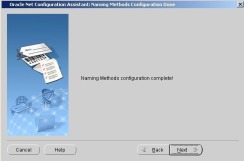
oracleClient20

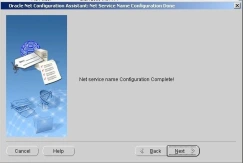
Select Next.

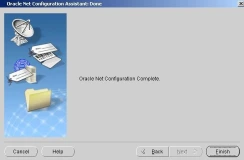
oracleClient21

Select Finish.

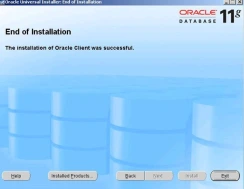
oracleClient22

Select Exit.

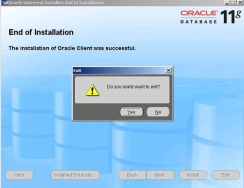
oracleClient23

Select Yes.

oracleClient24

Congratulations you’ve installed the Oracle client! My thanks to an Oracle colleague who wishes to remain anonymous. He was a big help with the installation and putting together this guide. In part two of this blog series we’ll look at querying an Oracle database from Powershell.

Posted in PowerShell | 2 Comments

Suncoast Technology Forum Tech Fest Event 2010

I presented a 30 minute session at Suncoast Technology Forum Tech Fest on Windows Scripting Automation with Powershell: "This session will provide an introduction to Powershell for IT Pros seeking to automate administration tasks. Specific topics covered configuring Powershell, tips and tricks to help you get started with Powershell and writing simple scripts to automate everyday tasks."
 
The presentation and supporting materials are available here:

Posted in PowerShell | Leave a comment

The T-SQL Hammer

The over-reliance on a familiar tool is best described with the quote, “if all you have is hammer, everything looks like nail” and for database professionals this means using or sometimes misusing T-SQL. Whenever database administrators are presented with a scripting problem they instinctively reach for good-old-familiar T-SQL.  And why not? In many cases T-SQL provides an ideal solution to SQL Server administration scripting problems, however there are certain scenarios where another tool, Powershell provides a  more elegant solution.

One such problem is scripting of database objects, T-SQL simply does not handle the complexities of objects script creation very well. In an attempt to use a familiar tool many people have written T-SQL scripts that trudge through system tables to produce an object creation script. The problem with such scripts is that they tend to be ugly, lengthy pieces of code that easily break. Experienced DBAs know querying system table directly is poor practice, yet they do it anyways in order to use their hammer T-SQL tool. There’s a better way, SQL Server Management Objects (SMO) has taken care of many of these issues for us and all we need to do is write a little Powershell code.

As an example let’s look at an object script problem from Brent Ozar’s post, “How to REALLY Compress Your SQL Server Backups.” He describes a database size compression solution that does the following:

  1. Script out all of the non-clustered indexes in the database
  2. Save those definitions to a table (or a stored procedure)
  3. Create a stored proc that will loop through those index definitions and recreate them later
  4. Drop the indexes

Although Brent does not provide us with a script because in his words it’s a little duct-tape-y, he does link a to a couple of T-SQL based solutions:

Scripts to Drop and ReCreate Indexes in SQL Server 2005

SQL Server 2005: Script all Indexes

The authors of the T-SQL scripts use a classic SQL administration scripting technique of building code by interrogating various system tables. The scripts are not without issue. A quick glance at the comment section of the second script reveals a dozen corrections were made to the original post after various users ran into things not accounted for. The abundance of corrections further illustrates T-SQL does not provide a good method to script out database objects. Now, let’s look at a more complete Powershell and SMO based solution.

In order to store the index create and drop statements, we’ll need a table. I’m going to create the table in the same database:

CREATE TABLE [dbo].[IndexDdl](
    [DdlType] [varchar](10) NOT NULL,
    [IndexScript] [varchar](4000) NOT NULL
)

SQL Server 2008 provides a Powershell interface accessible from SQL Server Management Studio. Start Powershell from the Tables folder in SQL Server Management Studio:

startps0 

 sqlpsidx

Script out the non-clustered index drop statements and save them to the IndexDdl table:

$scriptingOptions = New-Object Microsoft.SqlServer.Management.Smo.ScriptingOptions            
$scriptingOptions.DdlHeaderOnly = $true            
$scriptingOptions.ScriptDrops = $true            
            
dir | foreach {$_.indexes}  | where {$_.IsClustered -eq $false -and $_.IsXmlIndex -eq $false} | `
foreach {$_.Script($scriptingOptions)} | foreach {invoke-sqlcmd -Query "INSERT dbo.IndexDdl VALUES('Drop','$_')"}

Using the SQL Server Powershell provider, we are able to get all indexes that are non-clustered and not an XML index and then call the SMO script method. Generating drop statements require a little extra setup in that we first need to create a scripting options object and set the DdlHeaderOnly and ScriptDrops properties to true. The resulting script is then inserted into the IndexDdl table. Note: Because the current connection is used the call to invoke-sqlcmd does not specify a server or database name.

Script out the create index statements:

dir | foreach {$_.indexes}  | where {$_.IsClustered -eq $false -and $_.IsXmlIndex -eq $false} | `
foreach {$_.Script()} | foreach {invoke-sqlcmd -Query "INSERT dbo.IndexDdl VALUES('Create','$_')"}

The create statement can use the default behavior of the script method, no extra setup required.

To execute the drop statements:

$drops = Invoke-sqlcmd -Query "SELECT IndexScript FROM dbo.IndexDdl WHERE DdlType = 'Drop'"            
$drops | foreach {Invoke-sqlcmd -Query "$_.IndexScript"}

And finally if needed, to execute the create statements:

$creates = Invoke-sqlcmd -Query "SELECT IndexScript FROM dbo.IndexDdl WHERE DdlType = 'Create'"            
$creates | foreach {Invoke-sqlcmd -Query "$($_.IndexScript)"}

Observations

Although the command are run interactively the Powershell scripts can easily be incorporated into a SQL Server Agent Powershell step job. The solution works on down level versions of SQL Server as long as SMO 10 (SQL 2008) and sqlps (SQL Server Powershell) are available. The Powershell and SMO based solution is much less code, more easily understandable and since a standard SMO Script method is used, less prone to breakage. Not every SQL Server administration problem is a nail. Put down your T-SQL hammer and pick up Powershell!

Posted in PowerShell | 2 Comments

Providing Online Help for Powershell Modules

As a finishing touch for the SQL Server Powershell Extensions 2.0 Release I wanted to provide an online version of the help documentation I created from both comment-based and MAML formats. I had two requirements I need to be able to automatically convert comment-based and MAML-based help into static HTML pages and I need a free place to host the pages. The reason for the latter requirement is that I’m kind of lazy about web hosting. I don’t have my own server and I really don’t have a desire to have my own site–that’s part of the reason I blog at http://chadwickmiller.spaces.live.com. So I need to find a free static web hosting service. But, my first task is to automatically create HTML pages…

Generating Help HTML Pages

My favorite Powershell scripts are the ones I don’t have to write and a great place to find ready-to-use Powershell scripts is PoshCode which hosts a repository of over 1,500 scripts. A quick search of PoshCode turned up a script called Out-Html by Vegard Hamar (whose script in turn is based on a script called Out-Wiki by Dimitry Sotnikov). The script converts help from pssnapin’s to HTML. I need to convert help for function and cmdlets within modules, so I performed a minor edit of Out-Html PoshCode creates a new version of a Powershell script if you modify an existing one. If you do make a useful modification, please consider sharing. This goes for original scripts also.. To use Out-Html I need to import my modules: sqlserver, repl, Agent, SQLParser and ShowMbrs. Next modify the last line of the Out-html script to filter for these modules:

Out-HTML ( get-command | where {($_.modulename -eq 'sqlserver' -or $_.modulename -eq 'repl' -or `
$_.modulename -eq 'Agent' -or $_.modulename -eq 'SQLParser' -or $_.modulename -eq 'SSIS' -or $_.modulename -eq 'ShowMbrs') -and $_.commandtype -ne 'Alias'}) $outputDir            

Finally, run Out-Html:

./Out-Html

And viola, 126 html files are produced in a folder named help under the current directory. The HTML files are pretty clean, but do contain a stray bracket, question mark and require some manual editing. Rather tweak the Out-Html script or mess around with Powershell I can easily fix all HTML documents using my favorite text editor, Vim:

  • Select all htm files in Explorer and select edit with single Vim
  • In command mode
args *.htm
argo %s/”<div>/<div>/ge | update
argo %s/</table>}/</table>/ge | update
 

If only Powershell ISE could do stuff like this, I might actually use it Open-mouthed. One other minor edit which I’ll explain in the next section, I need to rename default.htm to index.htm and index.html to default.htm. In addition, change the new index.htm line frame src="./default.htm". Having generated 126 HTML pages, I now need to find a place to host them…

Hosting Help HTML Pages

While searching for a place to plunk down my static we pages I found a blog post by Charles Engelke that describes how to use Google AppEngine for web hosting of static web pages–exactly what I’m looking for…
 

Setting Up a Google Application

To get started I had to perform a few setup tasks:

Testing Google Application

To setup a test/deployment environment on my machine. First I created a directory C:sqlpsx and subdirectory static i.e. C:sqlpsxstatic. I then moved all 126 htm files to the static directory.  Following Charles’ instructions I created an app.yaml file with the contents below and saved the file to C:sqlpsx

application: sqlpsx
version: 1
runtime: python
api_version: 1

handlers:
 url: (.*)/
  static_files: static1/index.htm
  upload: static/index.htm

 url: /
  static_dir: static

The yaml file sets the index file as the default page which is why a swapped default and index file content as described earlier and also specifies the static directory. I’m now ready to test the application using SDK…

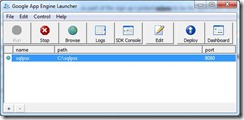
Start Google App Engine Launcher which is part of the SDK installed earlier. From the File menu select “Add Existing Application..” and navigate to the C:sqlpsx directory. Then click Run.

AppEngineLauncher

If everything is setup correctly clicking Browse allows me to test the application locally before deploying. Eureka It Works!

Deploying Google Application

Finally deploying the application is as simple as clicking Deploy

SQLPSX Online Help

The website isn’t very pretty, but not bad for a few hours work. The online help site for SQL Server Powershell Extensions is available at http://sqlpsx.appspot.com/. Enjoy!

Posted in PowerShell | Leave a comment

The Powershell V1 to V2 Conversion

This post is about my experience converting the CodePlex project, SQL Server Powershell Extensions (SQLPSX) Powershell V1 function libraries into PowerShell V2 Advanced functions within modules. 

In order to provide context for people reading this blog post a quick timeline is needed:

  • Powershell V1 was released in November 2006
  • SQLPS, the SQL Server Powershell host that ships with SQL Server 2008, is based on Powershell V1
  • Powershell V2 was released in October 2009
  • Everything you write in Powershell V1 should work in V2
  • SQLPSX is a CodePlex project I started for working with SQL Server and Powershell. The first release was July 2008 and it has frequently updated since. A Powershell V2 release was published on 12/31/2009
And with that hopefully the rest of this post makes sense. Let’s take a look at my top six list of Powershell V2 improvements over V1 for script developers: 
 

Modules

Modules allow a script developer to package functions, scripts, format files into something very easy to distribute. In Powershell V1 I would create a function library which is just a script file with related functions. The function library would then need to be sourced to use:
. ./librarySmo.ps1
 
There were several problems with this approach:
  • Handling related related script files and separate function libraries is difficult — usually solved by creating an initialization script and detailed instructions.
  • Loading assemblies
  • Appending format files
Modules make handling the distribution of a set of related files much easier. We simply place the module which is nothing more than the same old function library with .psm1 extension into a directory under DocumentWindowsPowerShellModules and optionally add a second special file called module manifest (more on this later). As an example I have sqlserver module in a directory DocumentWindowsPowerShellModulessqlserver. I can then import a module instead of sourcing the functions:
import-module sqlserver
 
The module and manifest file contain the necessary information about processing assemblies, related script files, and nested modules. So, converting function libraries to modules involves little more than renaming .ps1 files to the module file extension .psm1 and placing the file into it’s own directory under DocumentsWindowsPowershellModules. But, if that’s all you are going to do there is little value in creating modules. Moving from Powershell V1 scripts to V2 modules should also include taking advantage of many of the Powershell V2 features described in this blog post.
 
A word about binary modules: SQLPSX is mostly implemented as Powershell script modules there are however a couple of compiled cmdlets used for parsing and formatting of T-SQL scripts: Test-SqlScript and Out-Sqlscript. Converting compiled snapin dll’s to a module is just as easy as script based function libraries, you simply copy the snapin dll and any required assemblies to its own directory under DocumentsWindowsPowershellModules. This is exactly what I’ve done with the SQLParser module. I’ve also added a module manifest (psd1 file).
 
This brings us to module manifests which are basically processing instructions for moduels. Module manifests (psd1) files are created by new-modulemanifest cmdlet allow us to do several things:
  • Make functions private through by pattern matching the FunctionsToExport property. As an example in the SQLServer module I specify FunctionsToExport = ‘*-SQL*’ — This tell Powershell to only export function that match -SQL prefix. I have several helper functions that I don’t want to export, so I simply use a different prefix or none at all to avoid exporting.
  • Import assemblies automatically by making use of the RequiredAssemblies property
  • Nest modules i.e. import child modules with NestedModules property

The manifest files themselves are really easy to create. After you’ve created a module (.psm1), run new-modulemanifest and enter the information when prompted.

Simplified Error Checking

The try/catch error handling added to Powershell V2 is so much easier to work with and understand than its predecessor in Powershell V1 trap and thow. The construct is especially handy when dealing with SMO errors that sometimes use nested error objects.
 
Both validatescript and validateset reduce input validation code I needed to write. I think this is best illustrated by a couple of examples from SQLPSX functions
 
The param section below uses ValidateSet to ensure values are either Data or Log:
 
param(           
    [Parameter(Position=0, Mandatory=$true)] $sqlserver,           
    [ValidateSet("Data", "Log")]           
    [Parameter(Position=1, Mandatory=$true)] [string]$dirtype           
    )
 
This second param section uses ValidateScript to check that the input object namespace is an SMO object.
param(            
  [Parameter(Position=0, Mandatory=$true, ValueFromPipeline = $true)]            
  [ValidateScript({$_.GetType().Namespace -like "Microsoft.SqlServer.Management.Smo*"})] $smo,            
  [Parameter(Position=1, Mandatory=$false)] [Microsoft.SqlServer.Management.Smo.ScriptingOptions]$scriptingOptions=$(New-SqlScriptingOptions)            
  )
Between ValidateSet and ValidateScript I’m able to handle most input validation checks that in Powershell V1 would have required more code.
 

Testing

OK, so this items really isn’t about Powershell V2 rather it’s a change in process for me. As part of the conversion I wanted to adopt a testing framework and perform more rigorous testing. I first heard of a Powershell based xUnit testing framework on the Powerscripting podcast episode 80 in which Jon and Hal interviewed  Klaus Graefensteiner about his CodePlex project PSUnit. So, I decided to try PSUnit and I’ve been very happy with the results. Following the directions on the PSUnit site it is a cinch to setup. PSUnit integrates with Powershell ISE. A menu item is added to execute Unit tests:


It should be noted that although I’m using PSUnit to test Powershell functions this doesn’t mean that’s all its good for. In fact the purpose of the PSUnt is to perform full unit testing of your .NET applications. You can test just about anything (.NET, COM, etc). For my purposes I’m interested in testing my own Powershell functions.  As a script developer the easiest thing you can do with PSUnit is to create a test function for each of your functions and verify the output object is the type you expected. Here’s an example test function for Get-SqlServer:

function Test.Get-SqlServer([switch] $Category_GetSql)            
{            
    #Arrange            
    #Act            
    $Actual = Get-SqlServer "$env:computernamesql2K8"            
    Write-Debug $Actual            
    #Assert            
    Assert-That -ActualValue $Actual -Constraint {$ActualValue.GetType().Name -eq 'Server'}            
}

Althought most of the test functions I’ve created verify the object type. Of course you can develop more complex assertions.  This approach works very well for SQLPSX functions that return SMO objects like server, database, table, etc. The samples and documentation for PSUnit have additional examples. Once you create test functions you can easily test and repeat in a matter of minutes. The first time I ran through a complete test I had a failure rate around 10% of all functions. This means that 10% of the function never really worked. I thought I had tested everything, but without a framework in place things get missed. As part of the release I made sure every function tested and passed 100%. I really like the HTML reports PSUnit generates. Sample output from a test of the SQLServer module is available here. All SQLPSX test scripts are available in the source code area under "Test Scripts".
 
Big thanks to Klaus for creating PSUnit, I’m looking forward to seeing the soon-to-be release version 2.
 

Process from Pipeline

Embracing the pipeline is part of writing Powershell scripts to be well, more Powershell-like. In Powershell V1 I adopted a style of writing functions created Keith Hill as described in his blog post titled "Writing CMDLETs in PowerShell". The post shows us how to write functions to accept both command argument and pipeline input. Powershell V2 makes creating a function to accept both command argument and pipeline even easier. As example let’s look at a Powershell V1 function and the equivalent Powershell V2 function:

Powershell V1 function:
function Get-SqlScripter            
{            
    param($smo, $scriptingOptions=$(Set-SqlScriptingOptions))            
    begin            
    {            
        function Select-SqlScripter ($smo, $scriptingOptions=$(Set-SqlScriptingOptions))            
        {            
            $smo.Script($scriptingOptions)            
            
        } #Select-SqlScripter            
    }            
    process            
    {            
        if ($_)            
        {            
            if ($_.GetType().Namespace -like "Microsoft.SqlServer.Management.Smo*")            
            { Write-Verbose "Get-SqlScripter $($_.Name)"            
              Select-SqlScripter $_ $scriptingOptions }            
            else            
            { throw 'Get-SqlScripter:Param `$smo must be an SMO object.' }            
            
        }            
    }            
    end            
    {            
        if ($smo)            
        { $smo | Get-SqlScripter -scriptingOptions $scriptingOptions }            
    }            
            
}             
            
Powershell V2 function:
function Get-SqlScripter            
{            
    param(            
    [Parameter(Position=0, Mandatory=$true, ValueFromPipeline = $true)]            
    [ValidateScript({$_.GetType().Namespace -like "Microsoft.SqlServer.Management.Smo*"})] $smo,            
    [Parameter(Position=1, Mandatory=$false)] [Microsoft.SqlServer.Management.Smo.ScriptingOptions]$scriptingOptions=$(New-SqlScriptingOptions)            
    )            
            
    process            
    { $smo.Script($scriptingOptions) }            
            
}
The functions can be called from the pipeline:
Get-SqlDatabase "Z002sql2k8" "pubs" | Get-SqlTable -name "authors" | Get-SqlScripter
 
OR as a command line argument
$table = Get-SqlDatabase "Z002sql2k8" "pubs" | Get-SqlTable -name "authors"
Get-SqlScripter $table
 
Both functions perform the same function, however the Powershell V2 function is much simpler due to the use of "ValueFromPipeLine" this tells Powershell to accept input from the pipeline and the command line without a lot of extra coding.

Help

The ability to add comment-based to a function is huge benefit in usability. Prior to Powershell V2’s release I contemplated creating compiled cmdlets just so help would be available–I’m glad I waited. There are two ways to create help for scripts you can either use comment-based help or use an external MAML file (for compiled cmdlets MAML files are your only option). I briefly toyed with the idea of using External MAML files for scripts however there are limitations in needing to specify an absolute path plus MAML files are bit unwieldy to create. My advice if you’re going to create help for scripts or functions use comment-based help. The syntax for comment based help is very simple. Here’s an example comment-based help from SQLPSX:
<#
.SYNOPSIS
Scripts an SMO object.
.DESCRIPTION
The Get-SqlScripter function  calls the script method for an SMO object(s).
.INPUTS
Microsoft.SqlServer.Management.Smo.*
    You can pipe SMO objects to Get-SqlScripter
.OUTPUTS
System.String
    Get-SqlScripter returns an array System.String.
.EXAMPLE
Get-SqlDatabase "Z002sql2k8" "pubs" | Get-SqlTable | Get-SqlScripter
This command scripts out all user tables in the pubs database.
.EXAMPLE
Get-SqlDatabase "Z002sql2k8" "pubs" | Get-SqlTable -name "authors" | Get-SqlScripter
This command scripts out the authors table.
.EXAMPLE
$scriptingOptions = New-SqlScriptingOptions
$scriptingOptions.Permissions = $true
$scriptingOptions.IncludeIfNotExists = $true
Get-SqlDatabase "Z002sql2k8" "pubs" | Get-SqlTable | Get-SqlScripter -scriptingOptions $scriptingOptions
This command scripts out all users tables in the pubs database and passes a scriptingOptions.
.LINK
Get-SqlScripter
New-SqlScriptingOptions
#>
function Get-SqlScripter
 
I can then use get-help Get-SqlScripter -full to show help output with examples. I wish I could use comment-based help instead of MAML for compiled cmdlets!
 

new-object -property hashtable

One of great things about Powershell is the discoverability of objects. If you create a new object you can instantly see the objects properties and methods using Get-Member. Only one problem, the discoverability aspect tends to break down when the creators of the object model you’re using make bad design decisions, case in point the Microsoft.SqlServer.Replication.ScriptOptions. This enumeration uses a FlagsAttribute to allow bitwise combination of attributes. If this sounds confusing, it is. Fortunatley Powershell V2 adds a very clean way of creating objects that allow you to specify a hashtable as input. We can leverage this feature to create a more intuitive replication script options object.
 
First I created a file replscriptopts.ps1 with a hashtable of all the replication scrpting options, a subset is included below:
 
@{
Deletion = $false
Creation = $true
DisableReplicationDB = $false
EnableReplicationDB = $false
IncludeAgentProfiles = $false
}
 
Next I create a function which creates an object from the file:
 
function New-ReplScriptOptions
{
new-object PSObject -property (&"$scriptRootreplscriptopts.ps1") | add-member scriptproperty ScriptOptions `
{            
  $scriptOptions = [Microsoft.SqlServer.Replication.ScriptOptions]::None            
  $this | get-member -type NoteProperty | where {$this.($_.name)} |             
          foreach {$scriptOptions = $scriptOptions -bor [Microsoft.SqlServer.Replication.ScriptOptions]::($_.name)}            
  $scriptOptions            
} -passthru
}
 
The function, new-replscriptoptions creates a new object using a hashtable as input. The add-member portion adds a scriptproperty that calculates the bitwise representation of all properties where the value is set to true. So, rather than the bizare bitwise enumeration we started out with we now have a discoverable object.
 

I can then create a replication script options object and set the properties I wanted turned on to true and then use the object to script out my replication.
$scriptOpt = new-replscriptopts
$scriptOpt.Deletion = $true
$scriptOpt.Creation = $true
#Returns bitwise combination of properties
$scriptOpt.ScriptOptions


Gotchas

A few issues I ran into during the conversion and remembered to write down…
  • Cannot find type for custom attribute ‘Parameter ‘. Please make sure the assembly containing this type is loaded. Used this post from Richard Siddaway to resolve
  • Be careful with strongly typing parameters. For the most part it’s a good thing to strongly type variables, but I’ve found a few cases where it is isn’t. I have several functions where I add PSNoteProperties to a strongly type object. If I then pipe the output to be used by another function whiich is also strongly typed the noteproperties are striped away leaving just the original object. The solution is to not strongly type the parameter.
  • The position binder is supposed to be optional, however if I specify a parameterset this seems to be required in order to use positional.
  • I wasn’t able to do anything more than simple pattern matching with FunctionsToExport in the module manifest. This might be OK, but being able to explicitly list functions to export would be nice. What I ended up doing here is being very careful about adopting a standard prefix within a module.
  • By default all functions within a module are exported (this means they are available for use), however aliases are not. I spent a day wrestling with this issue and posted a StackOverFlow question. Although I agree aliases can sometime confuse things, not exporting alias by default I explicitly create within a module is counter-intuitive to the approach taken with functions. My thought is that if I didn’t want my aliases exported why would I create in my module? I’m sure this was a well-intentioned design decision, but it’s probably a little over thought.

Posted in PowerShell | 1 Comment

The Black Art of PowerShell V2 Version Numbers

Last week while helping someone in the SQLPSX forums having an issue importing modules I suspected they had a CTP version of Powershell, but being the skeptical person I am I needed proof. My first thought was there must be a simple built-in command to return the Powershell version number. In fact there there is with $PSVersionTable. This built-in variable was introduced in Powershell V2. If you run $PSVersionTable in Powershell V1 nothing will be returned. If you run $PSVersionTable on Powershell V2 you’ll get, a table of version information.
 
There’s one problem the version number information returned from $PSVersionTable will be different per OS platform and there isn’t single field that returns a consistent version number across platforms. For example on my x86 Vista the Powershell BuildVersion is 6.0.6002.18111. and on my x86 Windows 7 it is 6.1.7600.16385 yet both are RTM Powershell V2.
 
For someone coming from a SQL Server background this is suprising . I’ve run SQL Server on x86, x64 and IA-64 platforms with various operating systems, however @@version returns one version number regardless of platform. Of course there are other pieces of data to show the H/W platform and OS available if needed, but in most cases I just want to see the base version number.
 
Armed with this information I tweeted a question on Friday, Jan 22nd — "How do you tell if somone has a CTP version of  Powershell?" Powershell MVP, Max Trinidad quickly picked up on tweeter thread, tested a few things, blogged and involved other MVPs. The result is a blog post that helped me help someone else. Within a couple of days there were more blog posts on finding CTPs versions…
 
 
As a result of this exercise I learned several things:
 

The Powershell community and product team are awesome

OK, I already knew this, but how cool is it that you can tweet a question and have bunch people mobilize to help!

Powershell version numbering is wacked

Let’s fix this in Version 3. Please vote for my connection item to add a version property consistent across all platforms to $psversiontable

Tweeter moves faster than blogs. Blogs move faster than support articles

If I have a question that can easily be expressed in under 140 characters and isn’t too obscure I’ll use Tweeter. Usually I get some really good answers. There used to be a time when the first step to troubleshooting problems with Microsoft products was to search http://support.microsoft.com or going back in the real olden days the TechNet CD’s. Today the idea of looking at a KB article is often an afterthought done when Google/Bing turn up nothing. It would seem even product teams teams would rather blog than initiate a knowledge article. Not that this is a bad thing, personally I’d rather have the information delivered faster in a blog post. Support articles are generated by customer’s calls. When several customers call about the same issue a KB article is published. So, by putting the information out in a blog this may reduce customer calls which then mean no KB article. One last thought on KB articles, not only are they slow to produce, but because they are purely text based they simply haven’t kept pace with how people like to see information . Some of the most helpful blog posts I’ve found for troubleshooting an issue include screen prints or maybe even a video. It is more and more often that I’ll find the answer to problem or setup question in some helpful person’s blog.

For some reason which I don’t fully understand the Powershell team can’t pull down the Powershell CTP download

The problem with not pulling CTP releases is that people will mistakenly grab a CTP instead of a release version. This problem is compounded by search engines returning the Powershell Version 2 CTP download when searching for "Powershell Version 2 Download." I don’t know if Powershell bloggers who included links to CTP downloads in posts prior to release contribute to the search engine problem or not, but to be safe my suggestion — don’t include links to CTP releases in future posts for unreleased products. The CTP releases are generally pulled from download shortly after a product is released. I don’t know what is common practice as far as timing, but I do know I can’t find old CTP releases of SQL Server (or maybe I’m not looking hard enough). If you have an insight into CTP releases, please comment.

Posted in PowerShell | Leave a comment

SQL Saturday #32

I presented a one hour session at SQL Saturday #32 in Tampa on Powershell ETL: "In this sesssion we will look at performing common data loading tasks with Powershell. A basic understanding of PowerShell is helpful, but not necessary. Specific topics covered include importing structured files, XML, WMI objects and ADO.NET data sources."
 
SQL Saturday’s and Code Camps usually host a Powershell track and Tampa SQL Saturday was no exception. Aaraon Nelson and Ron Damron also presented complimentary Powershell sessions on Powershell for Data Professionals and Database Hardening via Powershell respectively. Between the three of use we had a half day of Powershell on Saturday!
 
My thanks to everyone in attendence. I hope to see many of you at our first Tampa Powershell User Group meeting on March 11, 2010. Feel free to post questions and comments. The presentation and supporting materials for the Powershell ETL session are available here:


Posted in PowerShell | Leave a comment